Your cart is currently empty!
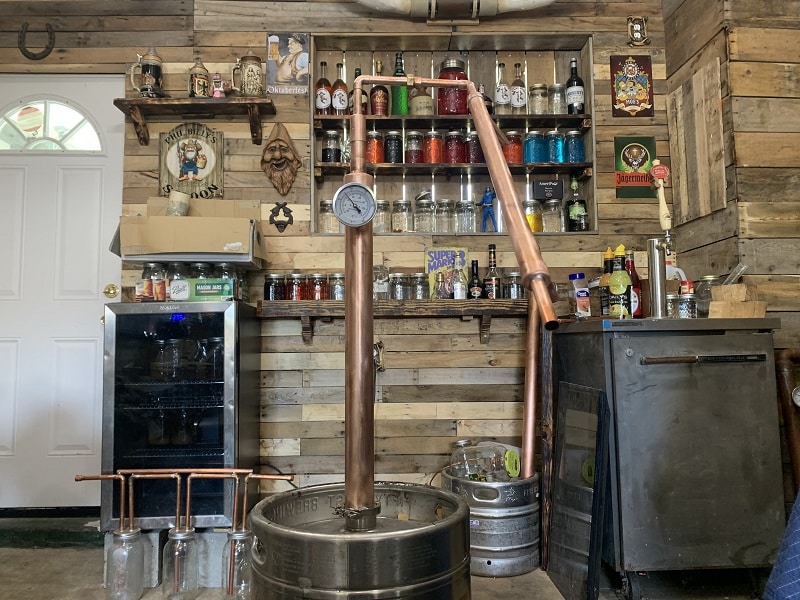
How To Build A Keg Still
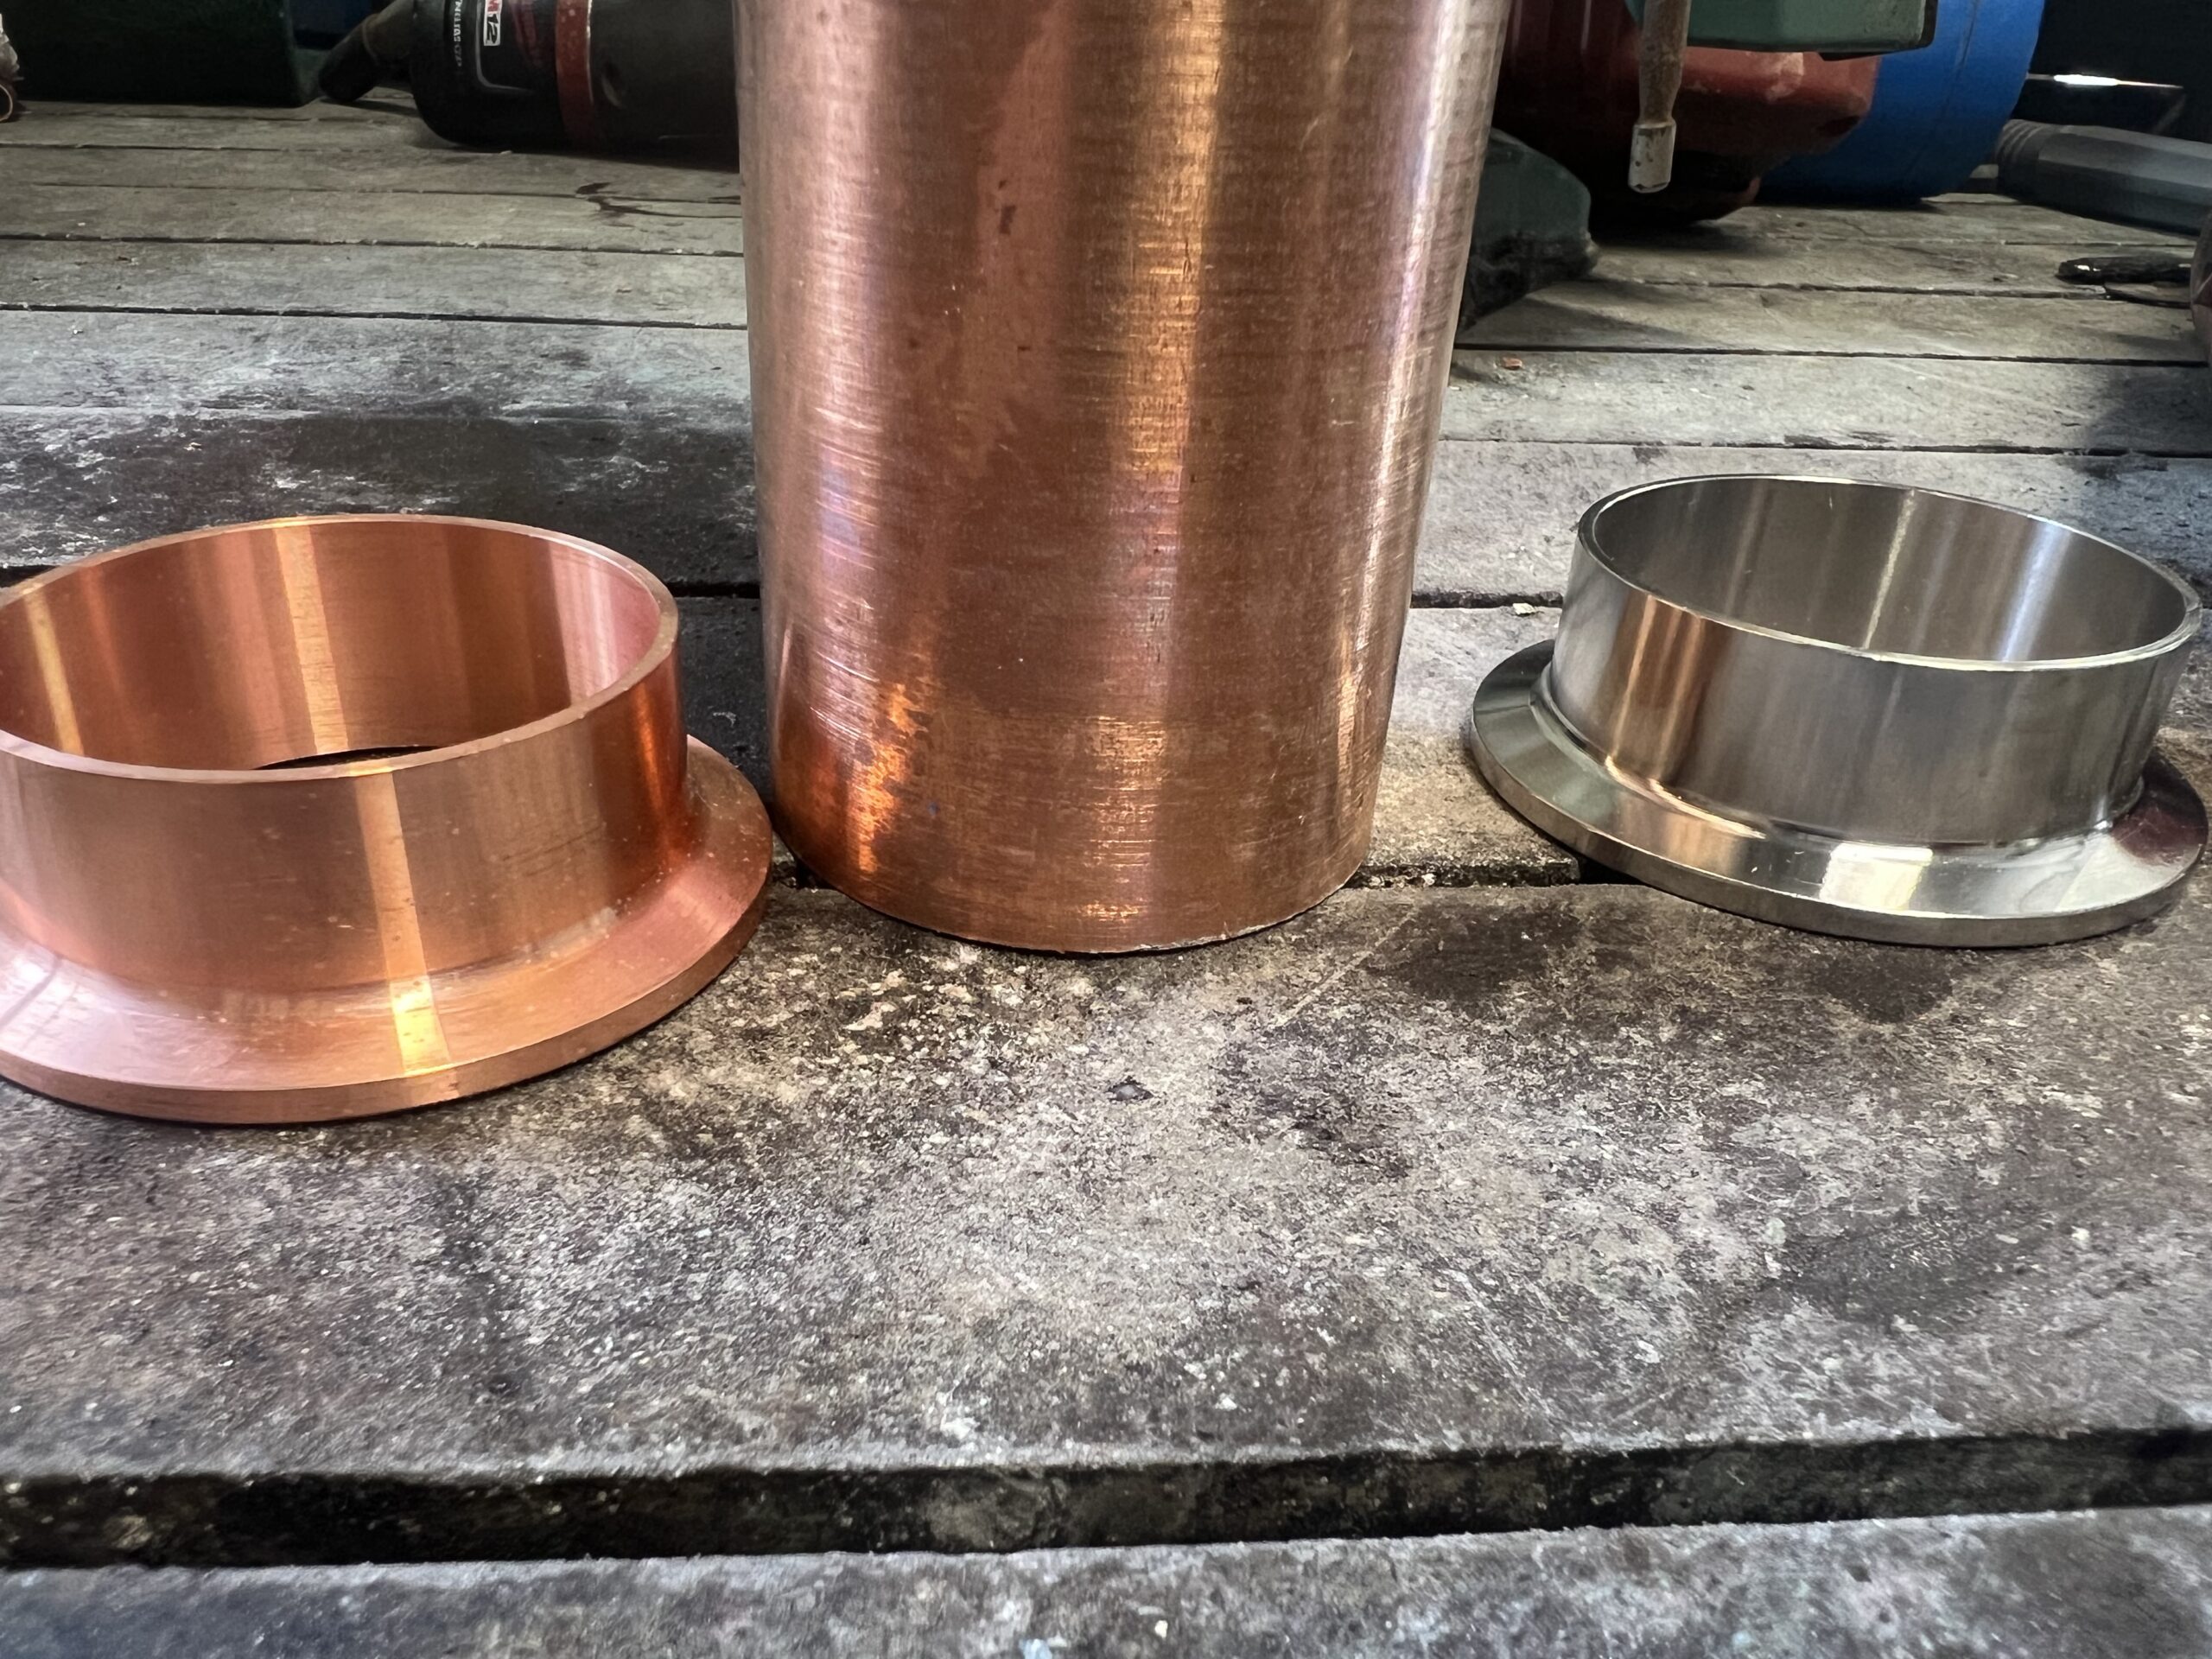
Choosing the Right Ferrule for Your Keg Still: Copper vs. Stainless Steel
When planning your keg still build, selecting the right type of ferrule is a crucial early step, as it will significantly influence how you construct your column. Let’s break down the options for your keg still project:
Copper Ferrules for Your Keg Still:
- Pros: Soldering a copper ferrule to a copper pipe for your keg still is generally a straightforward process.
- Cons: Copper ferrules tend to be more expensive and can sometimes be harder to source than their stainless steel counterparts.
- Soldering: If you choose a copper ferrule for your keg still, you can use a standard flux designed for copper-to-copper connections. I typically recommend water-soluble options like Harris Water Soluble Flux or Oatey No. 5 Flux.
Stainless Steel Ferrules for Your Keg Still:
- Pros: Traditionally, many keg still builders opt for stainless steel ferrules. They are very affordable, widely available, and known for their ruggedness and durability, making them a robust choice for your keg still.
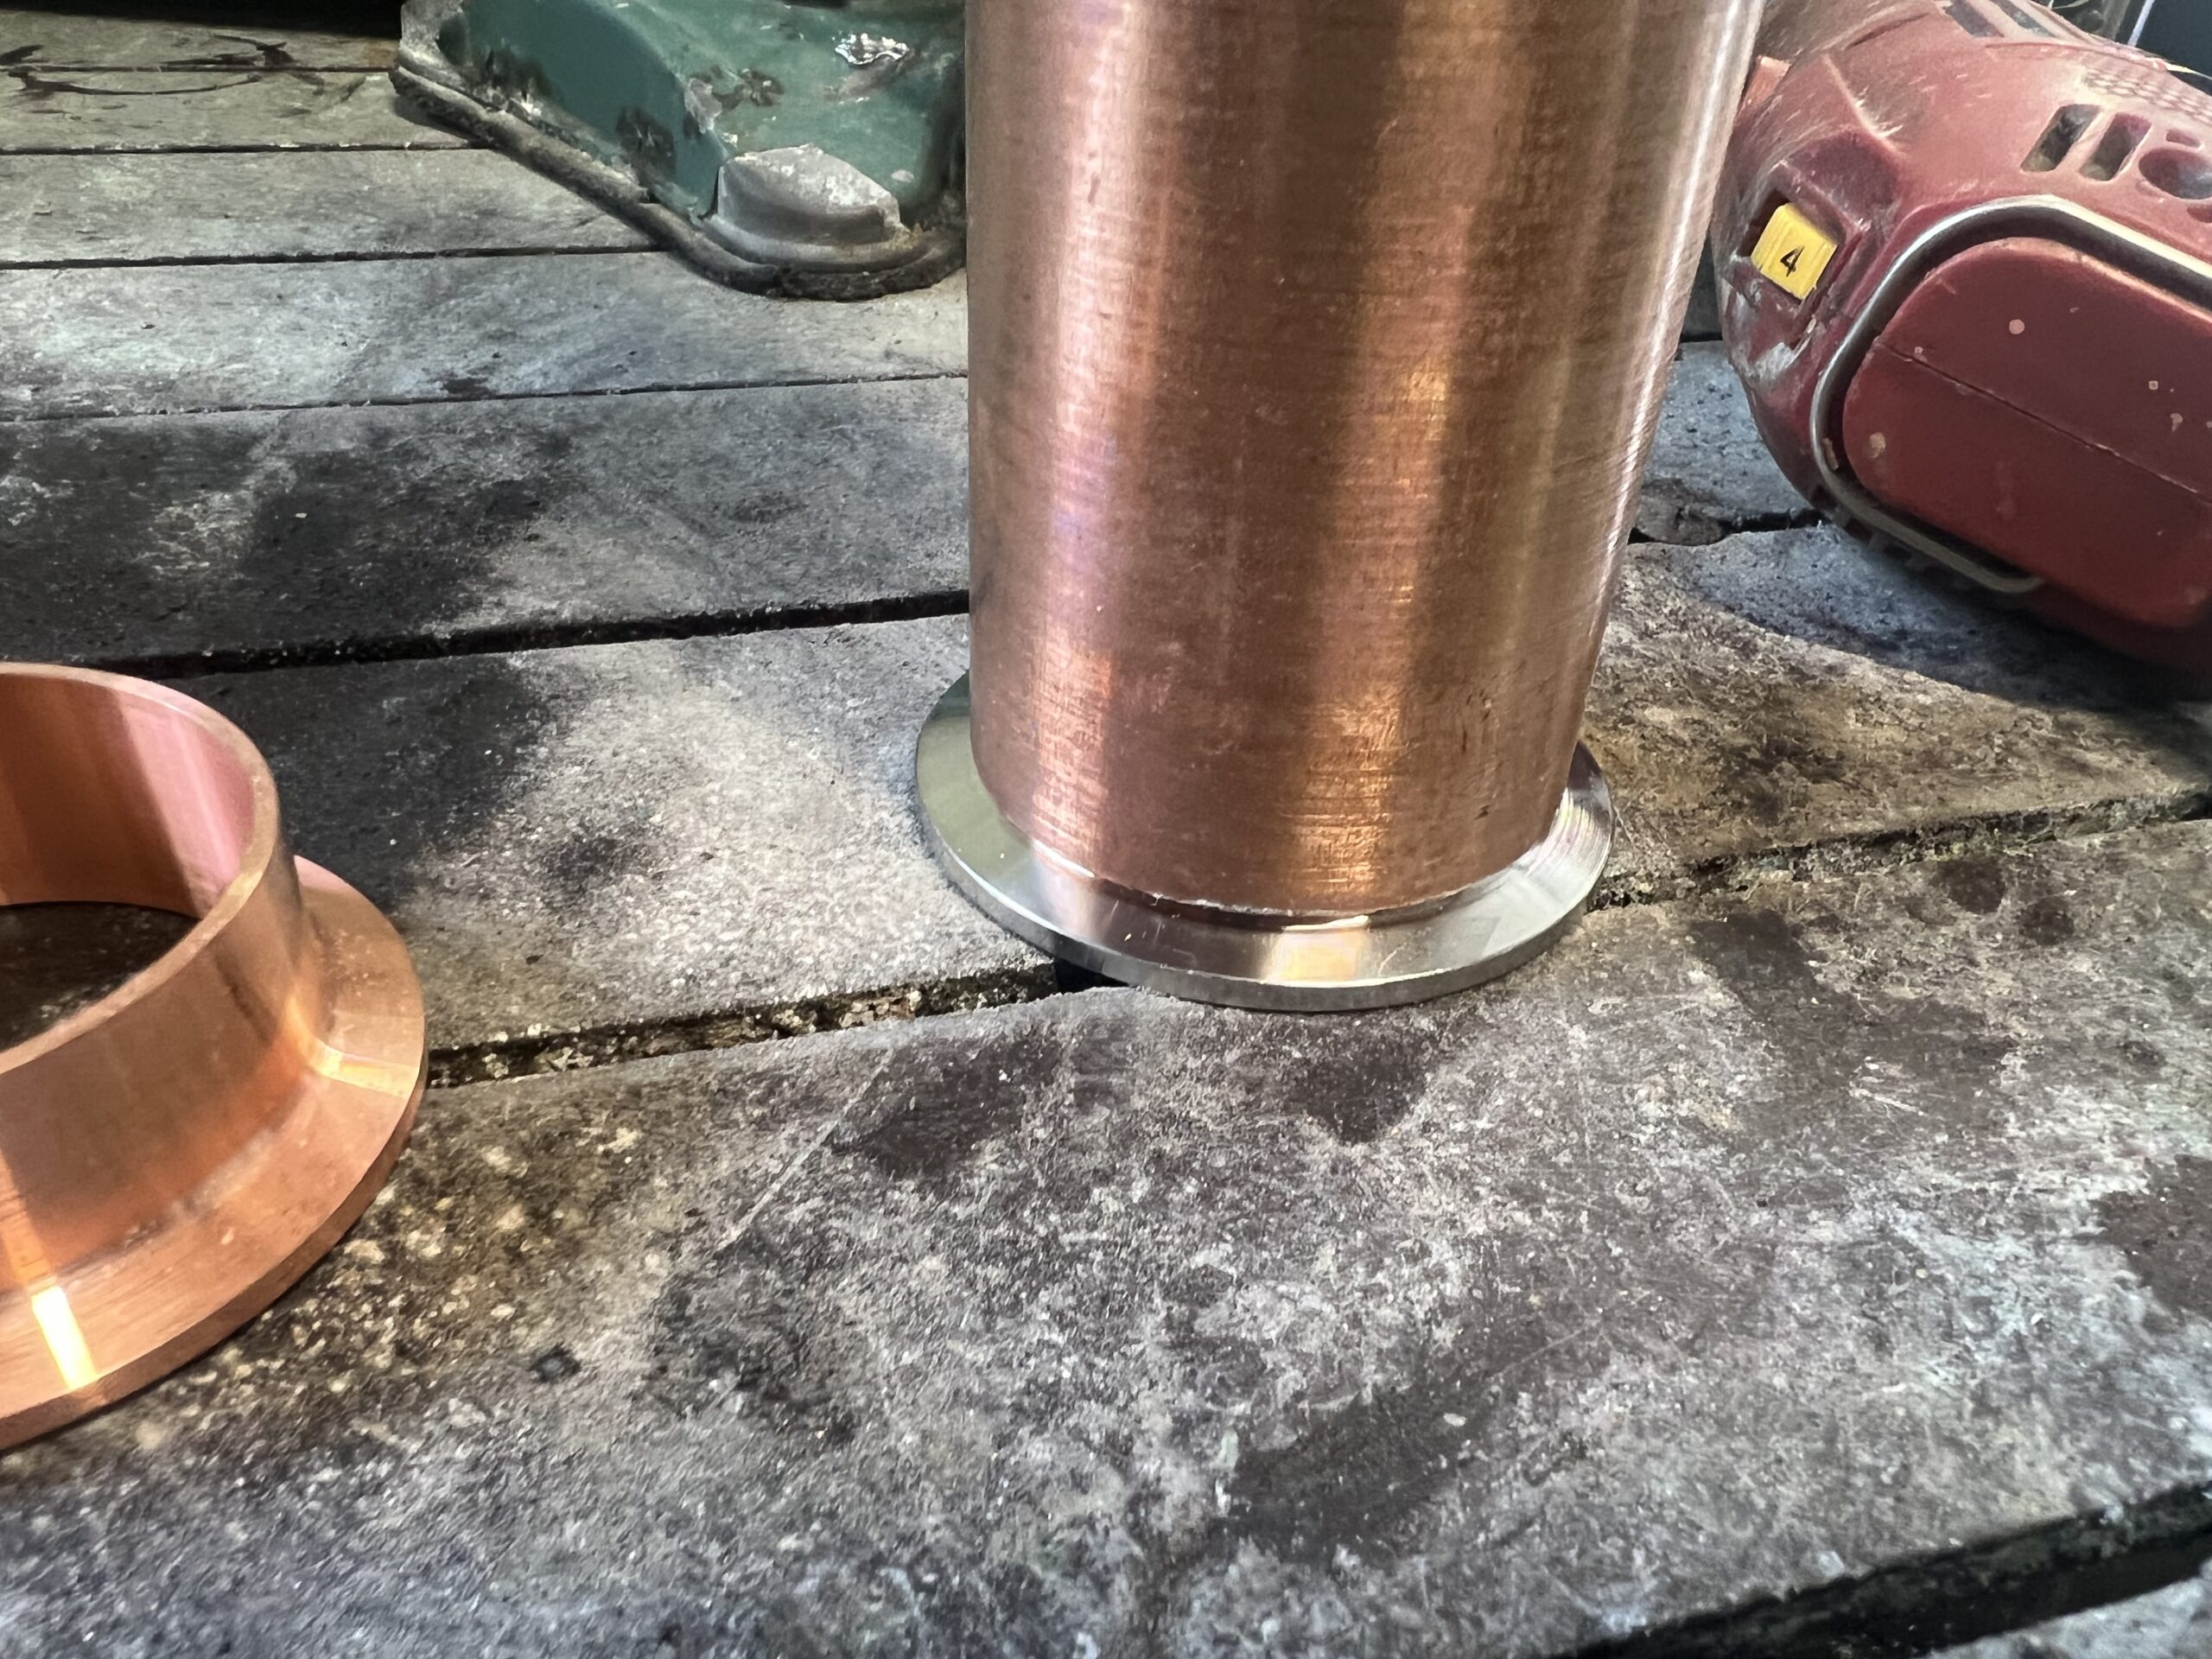
- Cons: Soldering stainless steel to copper requires a specific approach.
- Soldering Stainless to Copper for Your Keg Still: This is where the right materials are key. If you plan to attach a stainless steel ferrule to a copper pipe for your keg still, the secret lies in the flux. Standard solder (lead-free, of course) will work; we recommend brands like Silvabrite 100, Oatey No. 5 Lead-Free Solder, or Sterling Lead-Free Solder. However, you must use a specialized stainless steel flux. Our kit includes Ruby Fluid Stainless Steel Soldering Flux, which is designed for this exact purpose when building your keg still.
Important Soldering Tip for Your Keg Still:
Regardless of the ferrule material, always use a new solder brush for applying flux. These are inexpensive (usually under a dollar). Critically, if you’re using a special flux like Ruby Fluid for stainless steel, never use that same brush with other types of flux, as cross-contamination can hinder your soldering success on your keg still.
By understanding these differences, you can confidently choose the best ferrule for your keg still design and ensure you have the right materials for a successful build.
Building Your Keg Still Column: Connections and Assembly
Constructing the column is a critical phase in your keg still build. A key initial decision is how you’ll connect your keg still column to your condenser. Let’s explore the common options and then walk through the column assembly for your keg still.
Connecting Your Keg Still Column to the Condenser: Union vs. Tri-Fitting
You generally have two choices for this connection on your keg still: traditional unions or modern tri-fittings (also known as tri-clamp fittings).
- Unions: For a long time, unions were the standard for keg still construction. They are relatively easy to replace if they wear out. However, they can be prone to wear over time.
- Tri-Fittings: Increasingly, builders of keg stills are opting for tri-fittings. These connections are highly durable, create a superior seal, and generally last much longer. While the fitting itself is robust, the worst-case scenario is usually a worn-out gasket, which is inexpensive and simple to replace. For a reliable, long-lasting connection on your keg still, tri-fittings are often the preferred choice.
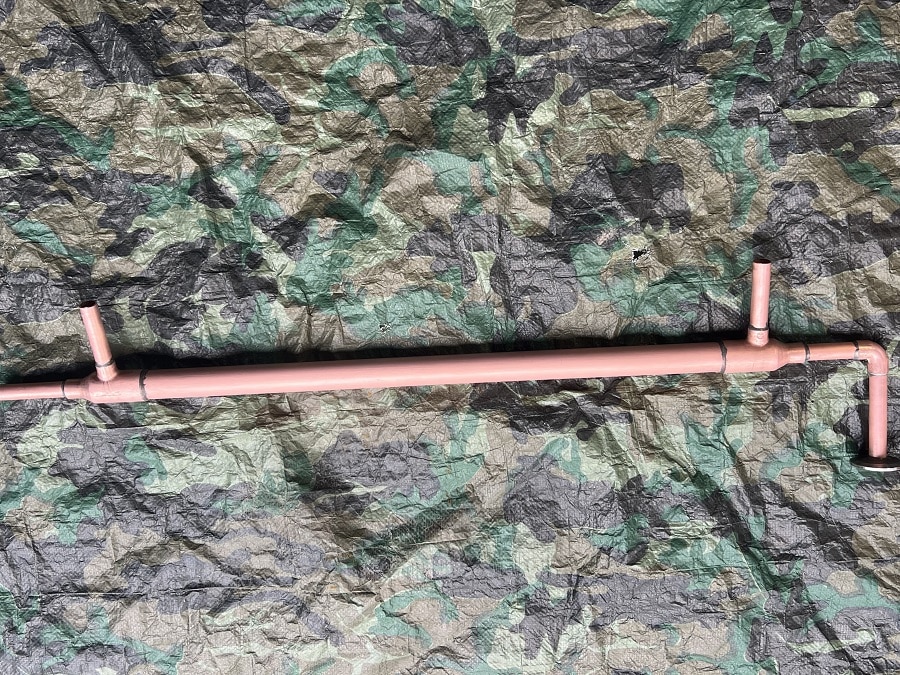
Assembling Your Keg Still Column:
Once you’ve decided on your connection method and have your two-inch copper pipe ready for your keg still column, follow these steps:
- Attach Bottom Ferrule: Solder your chosen ferrule (matching your keg connection) onto the bottom of the two-inch copper pipe. This will be the base of your keg still column.
- Install Top Reducer: On the top end of the two-inch pipe, solder a two-inch to half-inch reducer cap. This transitions the column of your keg still to the smaller diameter needed for the condenser connection.
- Create the Bend:
- Insert a short piece of half-inch copper pipe into the reducer cap.
- Solder a half-inch copper elbow onto this short piece.
- Attach another short piece of half-inch copper pipe to the other end of the elbow.
- Add Condenser Connection Fitting: Now, solder your chosen fitting (either the union part or the tri-fitting ferrule) to the end of the last piece of half-inch pipe. This will be the point where your keg still column connects to your condenser.
- Install Thermometer Port: The final step for your keg still column is adding a port for your thermometer.
- You’ll need to drill a hole in the side of your two-inch column for a copper NPT (National Pipe Thread) fitting. The exact placement can vary, but it’s typically towards the top of the column.
- A couple of step drill bits and a drill will be necessary to create a clean hole for the NPT fitting.
- Solder the copper NPT fitting into place. This will allow you to securely screw in your thermometer to monitor the vapor temperature in your keg still.
With these components assembled, your keg still column will be ready for integration with the rest of your distillation setup.

Constructing the Liebig Condenser for Your Keg Still
Now, let’s move on to building the Liebig condenser, an essential component for your keg still. This type of condenser uses a larger pipe as a cooling jacket around a smaller pipe through which the vapor travels.
Materials and Preparation for Your Keg Still Condenser:
For your keg still‘s Liebig condenser, we’ll primarily use one-inch copper pipe for the outer jacket and half-inch copper pipe for the inner vapor tube. You’ll also need two specific copper T-fittings.
- T-Fittings (One-Inch x Half-Inch x Half-Inch): These are crucial.
- If you’re sourcing these fittings yourself: Standard copper T-fittings often have a small internal bevel or stop. You will need to carefully grind this down on the inside. This allows the half-inch vapor tube to pass completely through the straight run of the “T.”
- If you’re using our Keg Still DIY Kit: The T-fittings included in our keg still kits are already drilled out and modified, ready for immediate use, saving you this step.
Assembling Your Keg Still’s Liebig Condenser:
- Prepare the Outer Jacket: Take your length of one-inch copper pipe.
- Attach T-Fittings: Solder one of the modified (or pre-drilled from our keg still kit) one-inch by half-inch by half-inch copper T-fittings onto each end of the one-inch pipe. Ensure the half-inch pass-throughs are aligned.
- Install Inner Vapor Tube: Carefully slide the long piece of half-inch copper pipe through the aligned T-fittings, running it down the center of the one-inch outer jacket. This half-inch pipe will carry the vapor from your keg still column.
- Create Cooling Water Inlet/Outlet:
- Cut two short pieces of half-inch copper pipe.
- Solder one short piece into each of the side (branch) outlets of the T-fittings. These will serve as the inlet and outlet ports for the cooling water that circulates around the vapor tube in your keg still‘s condenser.
- Form the Condenser Outlet:
- On the end of the long half-inch vapor tube that extends out from one of the T-fittings (this will be the product outlet end of your keg still condenser), solder a half-inch copper elbow.
- Attach another small piece of half-inch copper pipe to this elbow.
- Finally, solder your chosen connection fitting (the union or tri-fitting that matches what you used on your keg still column) to this last piece of half-inch pipe. This allows you to connect the condenser output.
Connecting and Using Your Keg Still:
Once your Liebig condenser is fully assembled, you should be able to connect your keg still column and condenser to your keg. Your keg still is then ready for the distillation process!
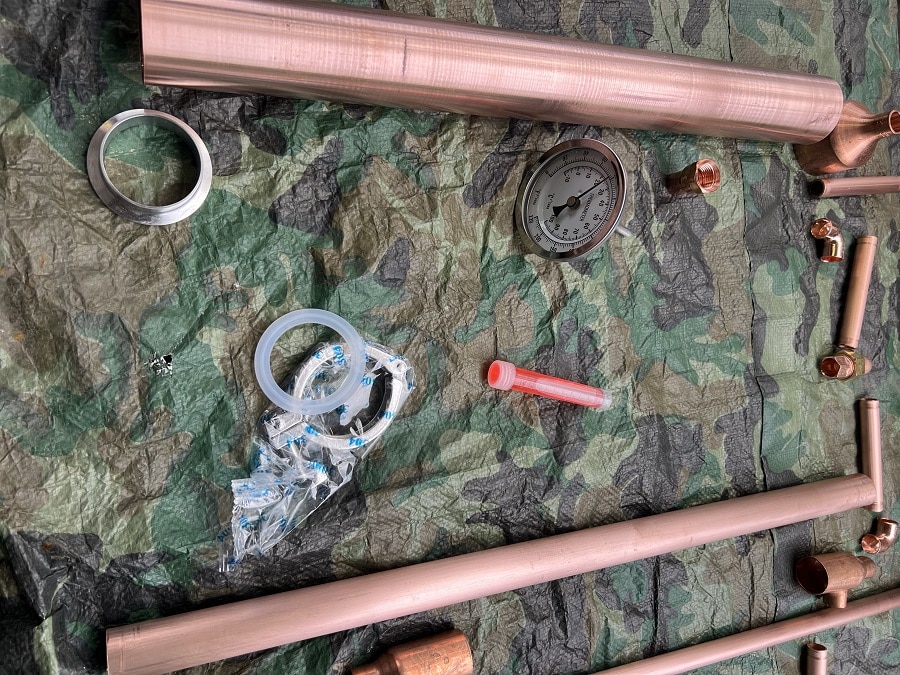
We offer a complete DIY keg still kit that includes all the necessary components for this project, including the pre-modified fittings. You’ll find helpful assembly videos on this page, and if you have any questions or need assistance while building your keg still, please don’t hesitate to give us a call.
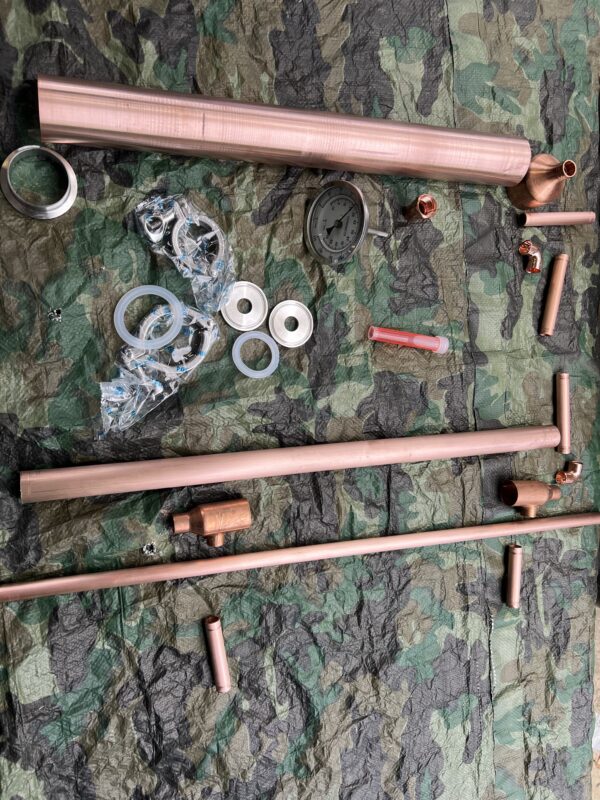
DIY Build Your Own Keg Still Kit
$199.99 – $229.99
Interested in building your own keg still? We offer a variety of kits to suit your preferences! Worried about soldering stainless steel? While we have helpful video tutorials, we also provide options that don’t require soldering the stainless steel parts to the copper ones, so you can still enjoy the satisfaction of building your own still.
Start by choosing your connection style: a classic union hookup or a modern 1.5-inch tri-fitting. Then, decide between a copper or stainless steel ferrule.
These kits are a fantastic way to get started, and we have step-by-step assembly videos on our blog. Plus, if you ever need assistance, don’t hesitate to give us a call!
Leave a Reply